
Here goes my first sewing tutorial :D
Things you will need
Wrapping paper 1 sheet 24cm x 19cm
Card stock 1 piece 22cm x 17cm
Copy paper 10 pieces 21cm x 16cm
Thread
Sewing machine
Before we get started please note that all my seem allowances are the side of my machine foot.
Lets get going.

First place the wrapping paper picture side down.
Put the cardboard on top in the centre.
I just do this by sight it doesn't need to be perfect.

Fold up the top and the bottom like you are wrapping a present
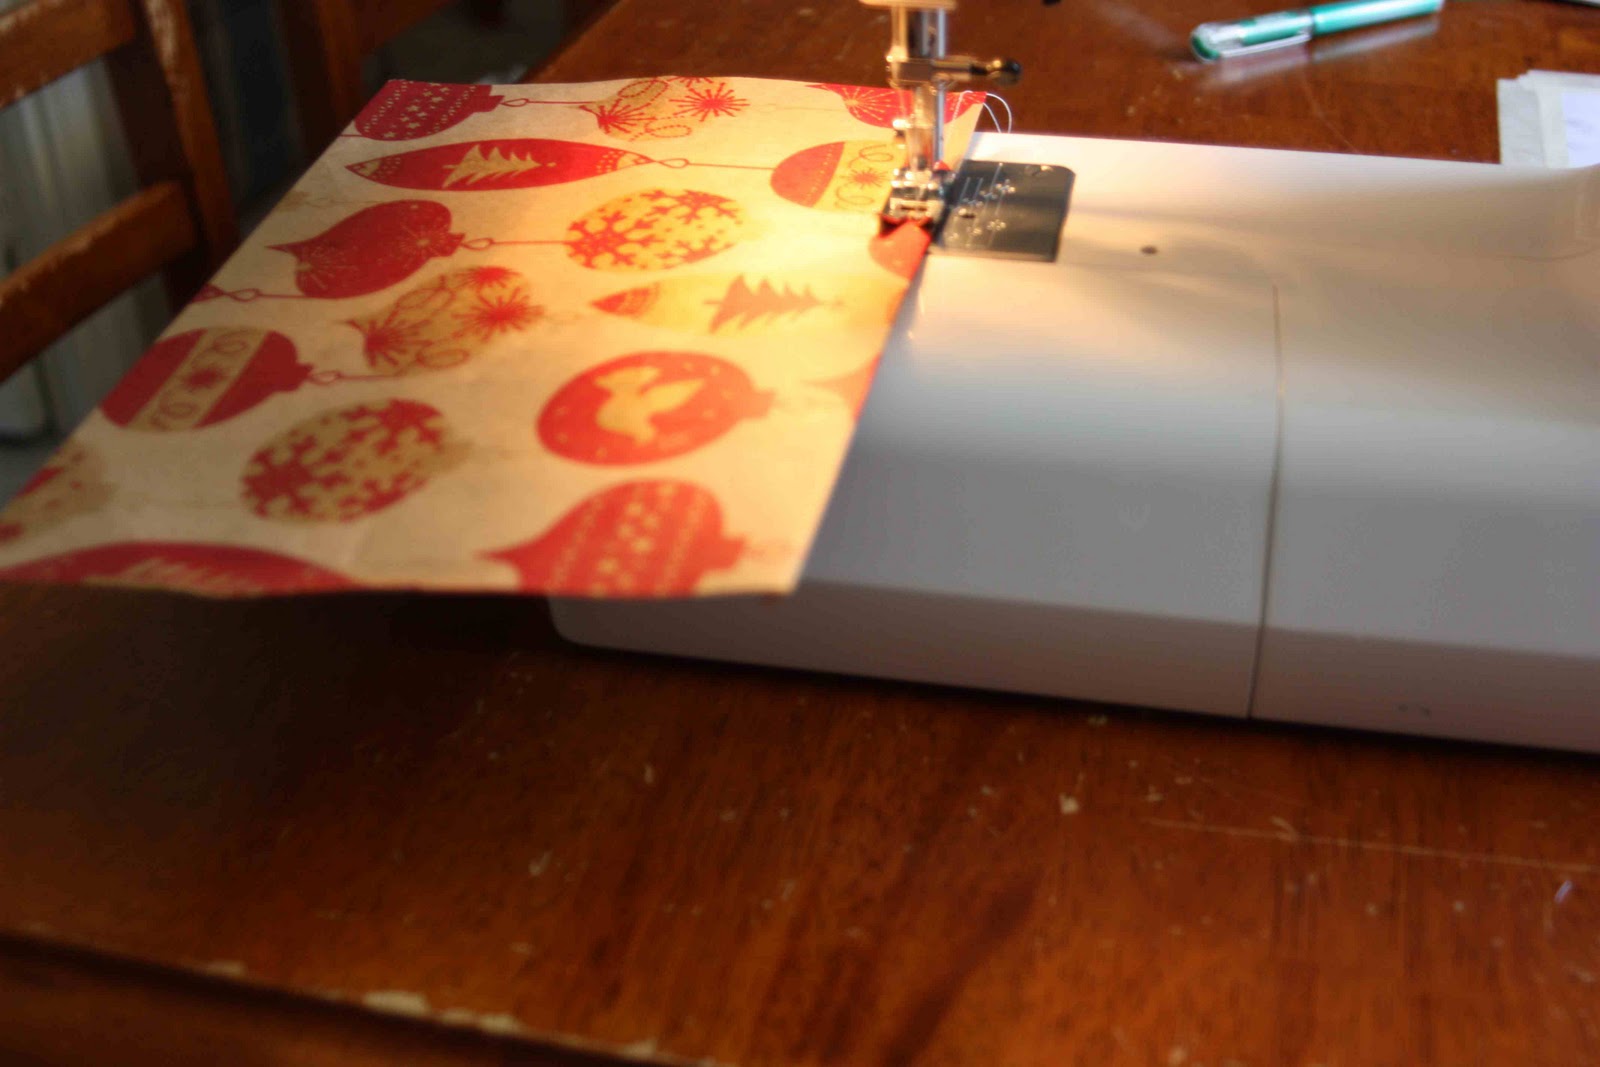
Using a medium size straight stitch sew along the top and bottom.
Do this with the print facing up the stitches look nicer that side.
Do check before you start sewing that the cardboard is in the centre and not to one edge.

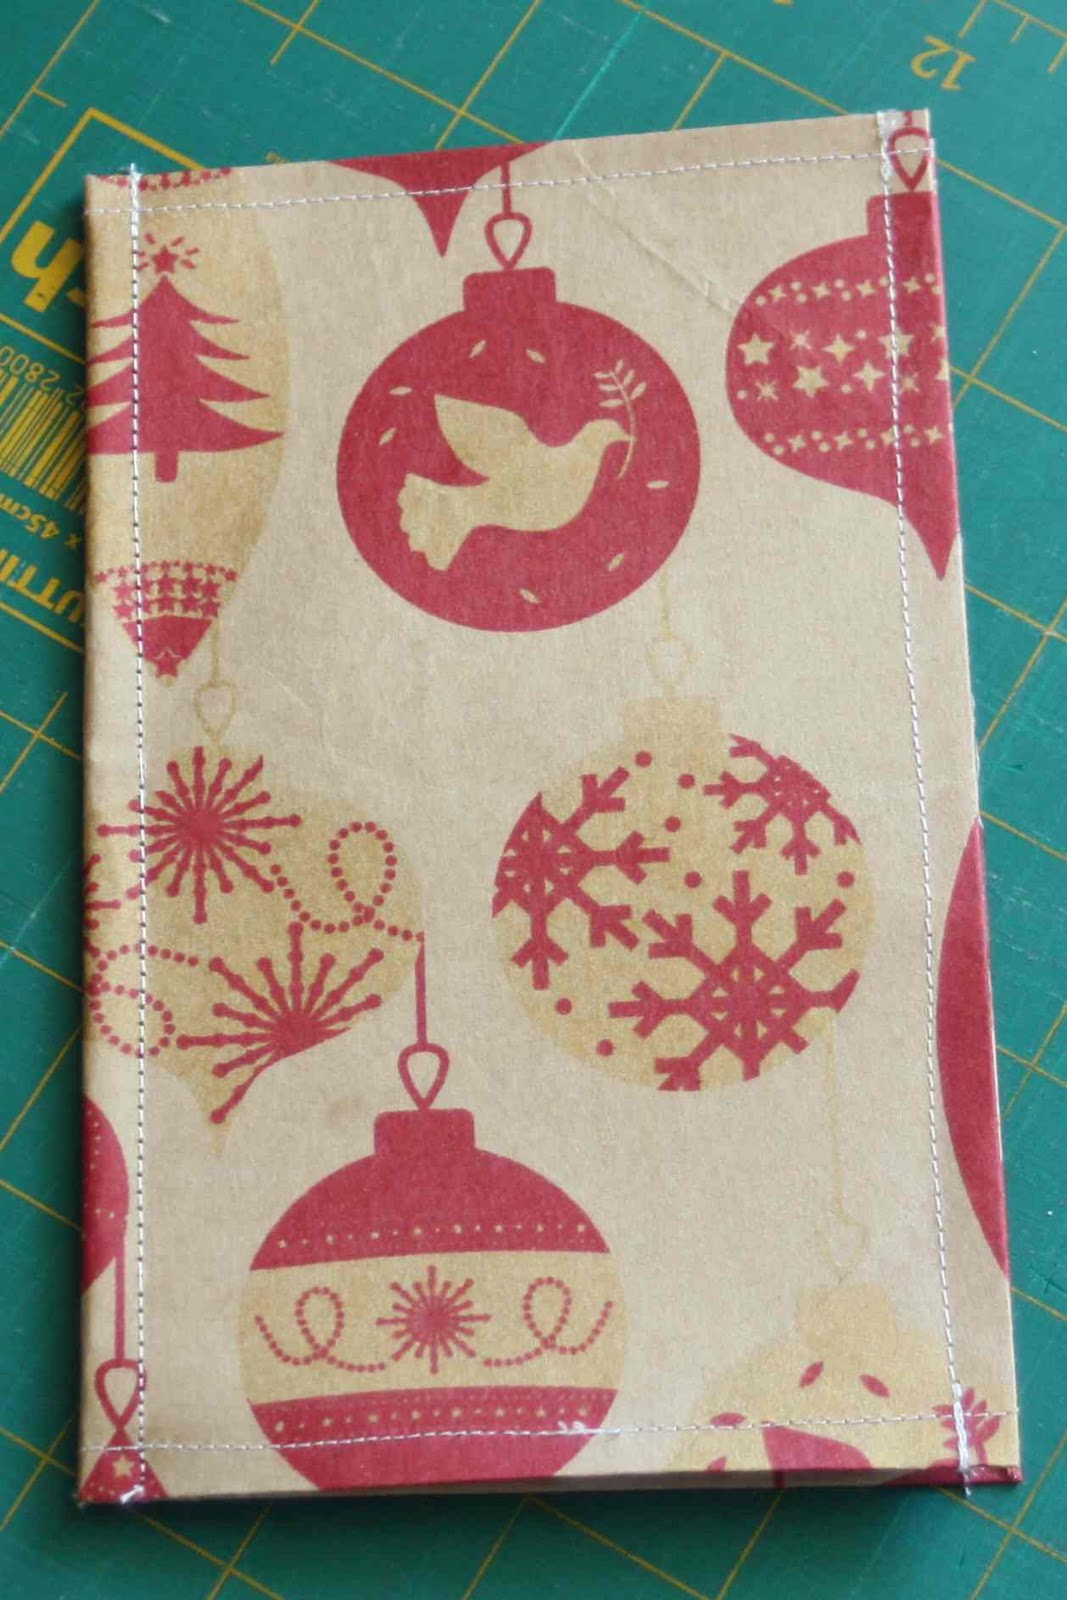
Now wrap the sides like a present.
I fold the corners then fold the sides.
Sew like the top and bottom, remember print side up :)

Now mark the centre of your card at the top and bottom.
This is your guide for sewing I do use a ruler for this :)

Put your sheets of copy paper on top.
The outside should line up with your stitches :)
Now just sew down the middle.

Fold in Half
Now you could stop there and it would be great but I do have one final step
I then sew down the spine to make it really flat.
I have made a note book with 20 sheets of paper but if you are going to use more than 10 sheets you can't sew along the spine as the machine doesn't like it :(
These are so fun to make and really quick.
I can make one in around 10 minutes how about you?


Thanks so much for posting that tute! I really want to make some. I wonder if I'll have time to get some supplies before Christmas. How did you cut the paper? Maybe I could use an old rotary cutter blade??
ReplyDeleteGreat tutorial. I think these would make great teacher gifts.
ReplyDeleteAngela